Showing posts with label Adventure. Show all posts

Saturday, 26 September 2026

Scenario #18: Foul Things Under Retebius - Lair of the Soul Breakers


This is a short adventure using the B/X rules and aimed at a character party of levels 3-5. It is set in Retebius in Thyatis, and is a follow-on to the post about chaos cults in the city. This is a dungeon adventure under the streets of Retebius, and I am assuming that the PCs have discovered that a chaos cult is using the sewers as their hideout through investigations and encounters around the city. Exactly how the PCs discover this is up to the DM - this adventure starts once the PCs drop down into the sewers.

About the Sewers

The sewers under Retebius are tubular, about 7’ radius on the inside and made of brickwork. They are never completely dry - there is a minimum of 1’ of filthy water in the sewers and after rainfall this can rise to 3’ (difficult for halflings to keep their heads clear). The sewers smell disgusting as would be expected - a lot of human waste, food scraps and animal droppings end up here. They are generally unlit - anyone venturing down will have to bring their own source of light. However, areas where human cultists live will be illuminated by fish-oil lamps or lanterns with a Continual Light spell cast on it. The openings to the actual lairs of the chaotic creatures are raised 2’ above the sewer floor and also slope up away from the actual sewers for a few feet so a raised sewage level will not overflow into the lairs.

As can be seen from the map there are sewers leading off the edges. Although whatever is down these fetid passages is not relevant to this adventure, nonetheless creative DMs may well add their own encounters elsewhere in the sewer system of Retebius.   

All inhabitants of the sewers and attached dungeon rooms, human or otherwise, should be considered hostile to intruders unless specifically stated otherwise.

Wandering monsters in the sewers (roll d10, number range after name is number encountered):

  1. Beetle, Giant Fire (1d6) AC 4, HD 1+2, hp 6, Mv 120’, THAC0 18, Att 1 bite for 2d4, Save F1, Ml 7, Align N, XP 15
  2. Carrion Crawler (1) AC 7, HD 3+1*, hp 15, Mv 120’, THAC0 16, Att 8 tentacles for 0+ paralysis or 1 bite for 1, Save F2, Ml 9, Align N, XP 75 (tentacle hit causes paralysis unless saved, paralysis lasts 1d4 turns).
  3. Cultist Guards (1d8), AC 5, Ftr1, hp 5, Mv 120’, THAC0 19, Att 1 weapon for 1d8, Save F1, Ml 8, Align C, XP 15, equipment: Chainmail, Battleaxe, Dagger, 3d6sp. These are human cultists patrolling the sewers in their cultist garb.
  4. Gray Ooze (1) AC 8, HD 3*, hp 13, Mv 10’, THAC0 17, Att 1 acidic slam for 2d8 + destroy armour, continuous damage after first attack, Save F2, Ml 12, Align N, XP 50. Acid attack destroys non-magical armour in 1 round, magical armour in 1 turn. Gray ooze sticks to the target after successful attack, causing automatic 2d8 damage/rnd. Immune to fire & cold.
  5. Lizard, Giant Gecko (1) AC 5, HD 3+1, hp 14, Mv 120'/climb 90', THAC0 16, Att 1 bite for 1d8, Save F2, Ml 7, Align N, XP 50
  6. Lizardman (1d3) AC 5, HD 2+1, hp 10, Mv 120’, THAC0 17, Att 1 weapon for 1d6+1, Save F2, Ml 12, Align C, XP 25 (note that these lizardmen are unusual in being chaotic, not neutral alignment)
  7. Rats, Giant (2d6) AC 7, HD ½ , hp 3, Mv 120', THAC0 20, Att 1 bite for 1d3 + disease, Save NM, Ml 8, Align N, XP 5
  8. Skeletons (1d6+1, animated by cultists): AC 7, HD 1, hp 4 each, Mv 60’, THAC0 19, Att 1 weapon for 1d6 dam, Save F1, Ml 12, Align C, XP 10
  9. Stirge (1d4) AC 7, HD 1, hp 5, Mv 30', Fly 180', THAC0 19, Att 1 for 1d3 +drain, Save F2. Ml 9, Al N, XP 13. Drain causes 1d3 damage per round (automatically hits). Stirges get +2 to initial attack due to dive speed
  10. Toad, Giant (1) AC 7, HD 2+2, hp 11, Mv 90’, THAC0 17, Att 1 tongue (no damage but pulls creatures within 15’ to toad) or bite for 1d4+1, Save F1, Ml 6, Align N, XP 25
The keyed areas are split up into 5 main sections, each with their own senior cult member in charge. 
  • Orgolo's Domain (rooms 1-6)
  • Lizardmen and Melhania's Domain (rooms 8-13)
  • Melbeek's Domain (rooms 14-16)
  • Raeshad's Domain (rooms 17-22)
  • Troglodyte Domain (rooms 23-26)

Key to the map


1) Guard post - This room holds 4 skeletons + 1 chaotic acolyte (Clr2). They attack intruders on sight.
Skeletons: AC 7, HD 1, hp 4 each, Mv 60’, THAC0 19, Att 1 weapon for 1d6 dam, Ml 12, Align C, XP 10
Chaotic Acolyte: AC 4, Clr 2, hp 5, Mv 90’, THAC0 19, Att 1 weapon for 1d6 dam, Ml 10, Align C, XP 25 (Equipment: chain mail, shield, mace, unholy symbol, purse with 32sp. Spells: Darkness (rev of Light))

2) Supplies: This room is filled with boxes and barrels of foodstuffs, including dried fruit, dried bread and barrels of wine and beer, most of which has been stolen or looted from townsfolk.

3) Chapel of Chaos - 1 Chaotic priest (Clr3) + 2 chaotic acolytes (Clr2). Towering over the north wall of this unhallowed place is a demonic statue, crude and non-magical but still scary. Kneeling in front of it, contemplating the nature of Chaos, is one of the leaders of the cult, Gemella the Brutal, and two of her acolytes. The chapel is lit by a silver candelabra worth 300gp.
Gemella the Brutal (Clr3 human female) is responsible for recruitment and training of new human cultists. She is considering approaching some gladiators in the city.
Chaotic Priest (Gemella the Brutal): AC 2, Clr 3, hp 12, Mv 60’, THAC0 18, Att 1 weapon for 1d6+1 or spell, Ml 10, Align C, XP 50 (Equipment: Plate mail, Shield, Mace, Unholy symbol, Potion of Levitation, purse with 34gp, 12sp + pale blue zircon gem worth 50gp, Spells: Command, Cure Light Wounds).
Chaotic Acolytes: AC 4, Clr 2, hp 6, 8, Mv 90’, THAC0 19, Att 1 weapon for 1d6+1 dam, Ml 10, Align C, XP 25 (Equipment: chain mail, shield, mace, unholy symbol, purses with 20sp & 16sp. Spells: Darkness (rev of Light) or Cure Light Wounds)

4) Kitchen. In here is a Chaotic warrior (Ftr2). This room has lots of pots, pans, knives and other utensils hanging on the walls or sitting on wobbly crude shelves. There is a wooden stove where a pot of mysterious stew is cooking. The chaotic warrior is the cook for the cult and he wields a large meat cleaver (treated as a sword).
Chaotic Warrior: AC 5, Ftr 2, hp 10, Mv 90’, THAC0 18, Att 1 weapon for 1d8+1, Ml 10, Align C, XP 20, (Equipment: chain mail, meat-cleaver (treat as sword), unholy symbol, 40sp).

5) Quarters of the Chaos Curate (Clr5). This room is well-appointed with a comfy bed, table, chair and desk (all looted from the town above). Underneath the bed is a loose flagstone with a sack of treasure (2630gp, 3200sp, 1 bejeweled silver dagger worth 250gp (still effective against lycanthropes and wights)).
Orgolo the Foul (Clr5 human male) is the leader of the cult and the most powerful cleric, and is primarily responsible for animating the undead in the sewer.
Chaos Curate (Orgolo the Foul): AC 1, Clr 5, hp 17, Mv 60’, THAC0 15, Att 1 weapon for 1d6+2 or spell, Ml 12, Align C, XP 300 (Equipment: plate mail, shield +1, mace +1, unholy symbol, amulet of animation (see below) Spells: Hold Person, Bane (rev. of Bless), Darkness, Cure Light Wounds)

6) Dormitory + 2 chaotic guards (Ftr1). This dorm is filled with 6 bunk beds (for up to 12 humans). The guards here have a 50% chance to not wear their chain mail (AC 9 instead of AC 5), unless they have advanced warning of enemies approaching. 
Chaotic Guard: AC 5, Ftr 1, hp 5, 7, Mv 90’, THAC0 19, Att 1 weapon for 1d8, Ml 10, Align C, XP 15 (Equipment: Chain mail, battleaxe, unholy symbol, purses with 7sp & 10sp).

7) Guard post - 3 zombies + 1 chaotic acolyte (Clr2) guard this room and will attack anyone they don't recognise. The acolyte can give the zombies basic orders. 
Chaotic Acolyte: AC 4, Clr 2, hp 7, Mv 90’, THAC0 19, Att 1 weapon for 1d6 dam, Ml 10, Align C, XP 25 (Equipment: chain mail, shield, mace, unholy symbol, purse with 25sp. Spell: Command)
Zombies: AC 8, HD 2, hp 9, 7, 4, Mv 120’, THAC0 18, Att 1 weapon for 1d8 dam, Ml 12, Align C, XP 20

8) Guard Post - 2 chaotic guards (Ftr1) + 1 lizardman
Chaotic Guard: AC 5, Ftr 1, hp 5, 5, Mv 90’, THAC0 19, Att 1 weapon for 1d8, Ml 10, Align C, XP 15 (Equipment: Chain mail, battleaxe, unholy symbol, purse with 14sp, 16sp)
Lizardman: AC 5, HD 2+1, hp 10, Mv 120’, THAC0 17, Att 1 weapon for 1d6+1, Save F2, Ml 12, Align C, XP 25

9) Lizardfolk bedding/nest - 3 lizardmen. This is the heart of the lizardfollk quarters in the sewers and is filled with piles of dirty straw. The three lizardfolk here will attack. 
Lizardman: AC 5, HD 2+1, hp 9, 8, 5, Mv 120’, THAC0 17, Att 1 weapon for 1d6+1, Save F2, Ml 12, Align C, XP 25

10) 1 chaotic warrior (Ftr2) + 2 chaotic guards and 6 beds for humans. This is another quarters for human rank and file of the cult including cult acolytes and guards. The chaotic warrior and guards each have a 50% chance of not wearing their armour (AC 9 not 4) here unless they have warning of approaching enemies. 
Chaotic Warrior: AC 4, Ftr2, hp 9, Mv 90’, THAC0 18, Att 1 weapon for 1d6+1, Ml 10, Align C, XP 25 (Equipment: chain mail, shield, sword, dagger, unholy symbol, purse with 10sp).
Chaotic Guard: AC 5, Ftr 1, hp 5, 5, Mv 90’, THAC0 19, Att 1 weapon for 1d8, Ml 10, Align C, XP 15 (Equipment: Chain mail, battleaxe, unholy symbol, purse with 14sp, 16sp)

11) 1 chaotic swordswoman (Ftr3) and pet giant ferret. This room also has her bed and a table. She wears her treasure - 2 non-magical necklaces worth 125gp and 150gp and 3 non-magical rings worth 50gp, 75gp and 85gp respectively 
Melhania the Huntress (Ftr3 human female) is the main raid leader of the cult and is most familiar with the city above ground. She occasionally travels the city in daylight, dressed as an adventurer and acting the part.
Chaotic Swordswoman (Melhania the Huntress): AC 3, Ftr3, hp 16, Mv 90’, THAC0 16, Att 1 weapon (sword) for 1d8+2 or 1 arrow for 1d6, Ml 10, Align C, XP 35 (Equipment: Chain mail +1, Sword +1, longbow, 20 arrows, quiver, unholy symbol.)
Giant Ferret: AC 5, HD 1+1, hp 6, Mv 150’, THAC0 18, Att 1 bite for 1d8, Save F1, Ml 8, Align N, XP 15

12) Lizardman leader (4HD) + pet giant gecko. In the corner of this room is a sack with 620gp +1400sp, the accumulated wealth of these chaotic lizardfolk.
Lizardman leader: AC 5, HD 4+2, hp 17, Mv 120’, THAC0 16, Att 1 weapon for 1d8+1, Ml 10, Align C, XP 125 (Equipment: Battleaxe)
Giant gecko: AC 5, HD 3+1, hp 14, Mv 120'/climb 90', THAC0 16, Att 1 bite for 1d8, Save F2, Ml 7, Align N, XP 50

13) Guard post - 2 lizardmen
Lizardmen: AC 5, HD 2+1, hp 11, 10, Mv 120’, THAC0 17, Att 1 weapon for 1d6+1, Save F2, Ml 12, Align C, XP 25

14) 4 skeletons + 2 zombies
Skeletons: AC 7, HD 1, hp 3, 3, 5, 7, Mv 60’, THAC0 19, Att 1 weapon for 1d6, Save F1, Ml 12, Align C, XP 10
Zombies: AC 8, HD 2, hp 11, 5, Mv 120’, THAC0 18, Att 1 weapon for 1d8 dam, Save F1, Ml 12, Align C, XP 20

15) 1 chaotic vicar (Clr4) + 2 zombies. This room has a bed, a table and a chest. Inside the chest is Melbeek’s treasure (120gp, 1100sp and a spherical carnelian gem worth 100gp).  
Melbeek the Sadistic - (Clr4 human male) speaks the languages of Lizardfolk and Troglodytes, and as such is important in keeping the reptilian hired muscle under control.
Chaotic Vicar (Melbeek the Sadistic): AC 3, Clr 4, hp 20, Mv 120’, THAC0 16, Att 1 weapon for 1d6+1 or 1 spell, Ml 10, Align C, XP 125 (Equipment: Chain Mail +1, Mace +1, Shield, Unholy Symbol, Potion of Gaseous Form; Spells: Cure Light Wounds, Darkness, Hold Person)
Zombies: AC 8, HD 2, hp 8, 11, Mv 120’, THAC0 18, Att 1 weapon for 1d8 dam, Ml 12, Align C, XP 20

16) Shrine of Chaos + 2 ghouls. This unlit room has a 3’ tall pedestal on which there is a blackened skull. This was the head of a powerful champion of Chaos from a long time ago and it still retains mystical properties. Any chaotic character who touches it with reverence will receive a Bless spell that lasts for 1d4+1 hours. Any chaotic character who touches it without caring about it will be the subject of a Quest spell (saving throw allowed) that compels them to aid the cause of Chaos in some way. If a neutral character touches the skull, it emits a loud scream and the character is affected as if by a Fear spell (save vs spells at -2). Any Lawful character touching it both triggers the loud scream and Fear spell plus must make an additional saving throw vs spells or suffer the effect of a Bane spell for 1d4+1 hours. The ghouls will attack anyone not wearing an unholy symbol of Chaos.
Ghouls: AC 6, HD 2, hp 5, 4, Mv 90’, THAC0 18, Att 2 claws/1 bite for 1d3/1d3/1d3 + paralysis (save vs paralysis, lasts for 2d4 turns), Ml 9, Align C, XP 25

17) Guard post - 4 chaotic guards (Ftr1)
Chaos Guard: AC 5, Ftr 1, hp 8, 6, 3, 3, Mv 90’, THAC0 19, Att 1 weapon for 1d8, Ml 10, Align C, XP 15 (Equipment: Chain mail, battleaxe, unholy symbol)

18) Chaotic Hero, Raeshad the Unforgiven (Ftr4) + 2 chaotic warriors (Ftr2). This room is Raeshad’s quarters and has his bed, table and collection of weapons. Under his bed is a locked wooden chest (the key is around Raeshad’s neck) that contains 950gp, 1500sp and four tourmaline gems worth 100gp each.
Raeshad the Unforgiven (Ftr4 human male) is the most senior fighter in the cult and as such maintains command (or at least intimidation) over the other chaotic fighters.
Chaotic Hero (Raeshad the Unforgiven): AC 2, Ftr4, hp 24, Mv 60’, THAC0 17, Att 1 sword for 1d8+2, Ml 10, Align C, XP 125 (Equipment: plate mail, Sword +1, shield, unholy symbol, key to treasure chest under bed)
Chaotic Warrior: AC 4, Ftr2, hp 9, Mv 90’, THAC0 18, Att 1 weapon for 1d6+1, Ml 10, Align C, XP 20 (Equipment: chain mail, shield, sword, dagger, unholy symbol, purse with 26sp & 22sp).

19) Armoury & training room - 2 chaotic guards (Ftr1) + 2 chaotic warriors (Ftr2)
Chaos Guard: AC 5, Ftr 1, hp 6, 4, Mv 90’, THAC0 19, Att 1 weapon for 1d8, Ml 10, Align C, XP 15 (Equipment: Chain mail, battleaxe, unholy symbol, purses with 15sp & 13sp)
Chaotic Warrior: AC 4, Ftr2, hp 12, 10, Mv 90’, THAC0 18, Att 1 weapon for 1d6+1, Ml 10, Align C, XP 20 (Equipment: chain mail, shield, sword, dagger, unholy symbol, purses with 16sp & 25sp).

20) Bunks & beds for humans, currently uninhabited. 

21) Guard post - 2 chaotic guards + 1 chaotic warrior + pet giant gecko
Chaotic Guard: AC 5, Ftr 1, hp 3, 5, Mv 90’, THAC0 19, Att 1 weapon for 1d8, Ml 10, Align C, XP 15 (Equipment: Chain mail, battleaxe, unholy symbol, purses with 11sp & 10sp)
Chaotic Warrior: AC 4, Ftr2, hp 9, Mv 90’, THAC0 18, Att 1 weapon for 1d6+1, Ml 10, Align C, XP 20 (Equipment: chain mail, shield, sword, dagger, unholy symbol, 20sp & 22sp).
Giant gecko: AC 5, HD 3+1, hp 14, Mv120'/climb 90', THAC0 16, Att 1 bite for 1d8, Save F2, Ml 7, Align N, XP 50

22) Pit (10’ deep) with 1 gray ooze & fake treasure chest at the far end on a ledge at floor level. Anyone falling into the pit suffers 1d6 damage and is attacked by the ooze. The pit is used for disposing of dead bodies the cultists consider too risky to allow to float around in the sewers.
Gray ooze: AC 8, HD 3, hp 15, Mv 10’, THAC0 17, Att 1 slam for 2d8, Save F2, Ml 12, Align N, XP 50 After the first hit, the ooze sticks to its victim, automatically destroying any normal armor and continuing to inflict 2d8 points of damage each round.

23) Troglodyte guard post with 2 troglodytes
Troglodyte: AC 6, HD 2, hp 5, 10, Mv 120’, THAC0 18, Att 2 claws/1 bite for 1d4/1d4/1d4 + stench, Save F2, Ml 9, Align C, XP 25

24) 3 troglodytes + nesting material
Troglodyte: AC 6, HD 2, hp 5, 10, Mv 120’, THAC0 18, Att 2 claws/1 bite for 1d4/1d4/1d4 + stench, Save F2, Ml 9, Align C, XP 25

25) 3 troglodytes
Troglodyte: AC 6, HD 2, hp 5, 10, Mv 120’, THAC0 18, Att 2 claws/1 bite for 1d4/1d4/1d4 + stench, Save F2, Ml 9, Align C, XP 25

26) 1 troglodyte leader + pet giant toad. The troglodyte leader has a leather sack hanging from the wall that contains the troglodyte band’s treasure: 26pp, 600gp, 2500sp and a Scroll of Protection from Lycanthropes.
Troglodyte leader: AC 6, HD 3, hp 12,THAC0 17, Att 2 claws/1 bite for 1d4/1d4/1d4 + stench, Save F3, Ml 12, Align C, XP 50
Giant Toad: AC 7, HD 2+2, hp 12, Mv 90’, Att 1 bite for 1d4+1 or 1 tongue for special, Save F1, Ml 6, Align N, XP 25

New Magic Item

Amulet of Animation. This dark amulet pulses with chaotic evil auras. Any chaotic cleric can use it to animate undead (as per the spell), animating a new corpse once per day. The cleric can control and maintain 2 animated undead per level (thus a 5th level cleric can control 10 skeletons or zombies using this amulet). Beyond that the cleric must decide whether the excess undead are left to roam freely (out of his control) or else deanimated (collapsing back as dead corpses). The amulet is useless in the hands of any other character class. If a lawful cleric holds onto this amulet, they suffer apathy and lethargy that causes -1 penalty to hit and -1 to saving throws.

Tuesday, 26 May 2026

Logos Location #16: Tower of the Nagpas


Cartography by Dyson Logos, source

Thanks to Dyson Logos' generosity, he has made a large number of his high quality maps available for use. I have decided (with his approval) to incorporate these into locations within Mystara.
This adventure is intended for characters of levels 7-9, and it uses my version of nagpas rather than the official one. This adventure involves multiple spellcasting creatures and as such it could be very dangerous for PC parties who are geared towards melee. 

Background to the Tower of the Nagpas

On the northern edge of the Great Waste of Sind, near the western end of the Khurish Massif, there are ruins of a once-great culture. The sages of Sayr Ulan (the capital of the Kingdom of Sind) have long been interested in their predecessors and about a month ago a wandering merchant brought to these sages a very old scroll found in the ruins which has generated much excitement in the academic community. One particularly adventurous sage, Mehnaz, set off north to the ruins but has not been seen since. The PCs are approached by two groups of sages: The first group would like to find their errant colleague and bring him back, alive if possible. The second is simply interested in retrieving more scrolls for research. 

Adventurers setting off can easily follow the trail to an outpost called Gunga Keep in the desert, which was the last known stop of Mehnaz before he headed north. The Sindhi soldiers know of an old abandoned tower north of Gunga Keep and suggest the PCs investigate that. 

Key to the map

1) Outbuilding: 2 minotaur skeletons stand guard. They were previously guards of the nagpa who died in combat and have been reanimated. There is a flight of stairs heading down into the ground (to room 9). This outbuilding is covered with a flimsy wooded roof on top of its stone walls, 
Minotaur skeleton: AC 6, HD 6, Move 120ft, THAC0 14, Att 1 gore or 1 bite for 1d6, Save F3, Ml 12, Align Chaotic, XP 275. Undead: As undead minotaur skeletons are immune to poison, disease, Sleep and Charm.  

2) 1 lesser nagpa is posted here, keeping an eye on the minotaur skeletons. There is also a spiral flight of stairs that go up to area 5 and also down to area 8
Lesser Nagpa Antoris: 
Memorised spells: Dispel Magic, Web, Read Magic
Treasure: 40pp
 
3) 1 minotaur is resting here, ready to act as muscle if the lesser nagpa in room 2 is in trouble. 

4) Empty

5) Empty apart from rubble and broken furniture. There are some books on the ground - most are too badly chewed up by vermin but there are two that are intact: one is an elvish history of the civilizatons that used to dwell in the area before it became the Great Waste, worth 1000gp to history scholars. The other is written in a form of Hulean, an account of a mage finding out his colleagues and rivals are making dark pacts with powers of Chaos and becoming Nagpas, worth 500gp. 
 
6) Tower summit. Here is a lesser nagpa and its pet, a gargoyle. They are supposed to be watching the surrounding land for approaching threats but neither is paying attention, being stuck in an argument about the gargoyle’s poor behaviour. 

Lesser Nagpa Breekill: 
Memorised spells: Clairvoyance, Levitate, Sleep
Treasure: 22pp + 1 beryl gem worth 300gp

Gargoyle: AC 5, HD 4, 14 hp, Move 90ft/fly 150ft, THAC0 16, Att 1 bite/1 horn/2 claws for 1d6/1d4/1d3/1d3, Save F8, Ml 11, Align Chaotic, 
Gargoyles are immune to normal weapons and require spells or magic weapons to hit. 

7) 1 Nagpa has its quarters here. 
Nagpa Chanaktor:
Memorised spells: Wall of Ice, Dispel Magic, Web, Sleep 
Treasure: 20pp + potion of extra healing (restores 3d6+3 hp)

8) Stairs leading up to area 2 and down to area 14

9) 3 minotaurs are dismembering the carcass of a desert antelope. They will attack strangers on sight. There are also several other butchered animal carcasses hanging from hooks on the ceiling.  

10) No creatures although there are numerous sleeping couches here, used by the nagpas. 

11) Corridor. Halfway along there is a branch north  that has caved in behind a door. The door still opens and on the floor immediately beyond is a scroll. Anybody looking at the writing on the scroll  activates the Explosive Rune, causing 6d4+6 fire damage to all within 10ft range. A save vs spells reduces this to half damage. The explosion may also attract the attention of nagpas in room 12.

12) The Study. Here are 2 lesser nagpas reading books. They will attack strangers on sight. Also on the east wall there are 2 shelves, one with books, one with scrolls. The scrolls are of interest to scholars though not as much as the ones in room 18. These ones are worth 100gp each and there are 20 of them. On the bookshelf there are 3 spell books that are shared by the nagpas for their memorised spells. 
Book 1: 
    1st level: Magic Missile
    2nd level: Levitate
    3rd level: Dispel Magic, Explosive Rune (borrowed from AD&D)
    4th level: Dimension Door, Wall of Ice 
Book 2: 
    1st level: Read Magic
    2nd level: Caustic Bolt, Detect Invisible
    4th level: Polymorph Self
Book 3: 
    1st level: Sleep
    2nd level: Web
    3rd level: Protection from Normal Missiles
Note that the DM can add new spells here if wanted. 

Lesser Nagpa Dorrishon: 
Memorised spells: Dispel Magic, Levitate, Sleep 
Treasure: 36pp

Lesser Nagpa Eigorn:
Memorised Spells: Magic Missile, Caustic Bolt, Protection from Normal Missiles
Treasure: 20pp + Potion of Flying

13) Stairs down. This is the lair of a minotaur boss who acts as if the leader of the minotaurs here, though he realises that even he answers to the nagpas. He wears an oversized chain mail shirt and wields a halberd, There is also a flight of stairs heading down to area 15.  In his chest he holds the minotaur tribe's treasure: 12,500sp, 4300gp and 260pp as well as a Crossbow +2 and a Dagger +2 +4 when used to Backstab/Sneak Attack. 
Minotaur Boss: AC 4, HD 9, hp 45, THAC0 11, Att 1 polearm for 1d10+3, Save F9, Ml 11, Align Chaotic, XP 900
Art by Bill Willingham
from B2: Keep on the Borderlands


14) The cells. This passageway has stairs going up to area 8 as well as 4 small chambers, each with a locked door. 
a) Empty apart from rubble from partially collapsed ceiling. 
b) Menhaz the Scholar (human male, MU4, AC 9, hp 5, Move 90ft, att none, save MU4, Ml 5, Align Neutral), a prisoner of the nagpas who is not very heroic but will cooperate with any rescuers. 
c) Boxes with supplies of ink, vellum, quills, blank books and alchemical glassware. No creatures.  These stores are worth about 150gp but weigh 50lb. 
d) Minotaur imprisoned for trying to attack a nagpa. Due to be used as test subject in the nagpas’ experiments. He is raging and will attack any creature (including other minotaurs) that release him. 
 

15) 1 Nagpa +1 minotaur. This particular nagpa has the keys to unlock to cell doors in room 14
Nagpa Forzzen: 
Memorised spells: Wall of Ice, Dispel Magic, Web, Sleep 
Treasure: wrought Silver medallion worth 500gp

16) The menagerie. Held in 4 forcefields are creatures the nagpas and minotaurs have captured for study and possible dissection: 
Red forcefield: 1 Otyugh
Yellow forcefield: 1 Displacer Beast
Cyan forcefield: 1 Rhagoddessa. 
Purple forcefield: 1 Centaur chief
There are also 4 gems embedded on pedestals around the room - each controls the forcefield of the same colour - pressing it down into the pedestal lowers that particular forcefield, pressing it again and the gem pops back up like the button on the end of a ballpoint pen, and the forcefield is turned back on.  They are Amber (yellow) on northwest, Amethyst (purple) on northeast, Aquamarine (cyan) on southeast, and garnet (red) on southwest. If prized from their pedestals each gem is worth 500gp. This will deactivate that forcefield and unleash that monster. The Rhagodessa and Displacer beast are both feral and will desperately try to get out of the dungeon, attacking anything in their way. The otyugh is less aggressive but still wants to get out. The centaur chief (called Wehhill) is wary of humans and demihumans but may recognise they are potential allies against the nagpa and minotaurs who have been attacking his centaur tribe. 
There is a nagpa here who will try to unleash the monsters if threatened. 
Nagpa Galazi:
Memorised spells: Polymorph Self, Dispel Magic, Web, Sleep
Treasure: 34pp + amber gem worth 100gp

Otyugh:AC 3, HD 7, hp 33, Move 60ft, THAC0 13, Att 1 bite/2 tentacles for 1d4+1 + disease/1d8/1d8, Save F7, Ml 10, Align Neutral, XP 450. Disease: anyone bitten by the otyugh must save vs poison or be infected by a rotting disease that causes 1d4hp damage per day as well as -2 to the sufferer’s saving throws until cured by a cleric 
Displacer Beast: AC 4, HD 6*, hp 30, Move 150ft, THAC0 14, Att 2 tentacles for 2d4/2d4, Save F6, Ml 11, Align Chaotic, XP 500. Displacement gives -2 bonus to AC (raising it up to AC 2) and +2 to all saving throws. 
Rhagoddessa: AC 5, HD 4+2, hp 20, Move 150ft, THAC0 15, Att 1 leg/1 bite for special/2d8, Save F2, Ml 9, Align Neutral, XP 125, Hit with leg means target is grappled and can automatically be bitten for 2d8 damage each round thereafter until released
Centaur chief: AC 7, HD 6, hp 24, Move 180ft, THAC0 14, Att 2 hooves for 1d6/1d6, Save F6, Ml 8, Align Neutral, XP 275

17) Alchemy labs. Here is a nagpa in deep research assisted by 2 gargoyles. It will react badly to anyone interrupting its study and instruct its stony lab assistants to attack.
Note that this lab is full of shelves and tables with bottles, flasks and brewing pots of strange chemicals and volatile compounds.  Roll 1d6 for any liquids investigated:
1. Acid 1d6 damage per round of contact
2. Volatile oil. Can be used as lantern oil or thrown as burning oil
3. Poison, as per poison potion
4. Noxious but not fatal. Save vs poison or suffer -2 to hit and to saves and to ability score checks for 2d4 turns. Vomiting is optional. 
5. Water
6. Potion - roll on random potion table in treasure section of the rules 
Nagpa Hessex: 
Memorised Spells: Magic Missile, Detect Invisible, Fly, Dimension Door
Treasure: 40pp + Potion of Extra Healing (restores 3d6+3hp)
Gargoyle: AC 5, HD 4, 14 hp, 16 hp, Move 90ft/fly 150ft, THAC0 16, Att 1 bite/1 horn/2 claws for 1d6/1d4/1d3/1d3, Save F8, Ml 11, Align Chaotic, 125xp
Gargoyles are immune to normal weapons and require spells or magic weapons to hit. 
 
18) Greater Nagpa’s quarters. As well as the leader of the nagpas, this room also contains a shelf at the east end which holds the scrolls of the ancients. Although not magical they are very valuable to scholars and sages (30 scrolls worth 500gp each). In addition the greater nagpa has a conventional treasure chest which is unlocked but has an Explosive Rune on the inside of the lid (causing 6d4+6 fire damage to all within 10ft range. A save vs spells reduces this to half damage). There is a lever on the side of the lid that covers up the rune so the chest can be opened safely. Inside is 8800pp + 4 rubies worth 1000gp each and a large blue diamond worth 6000gp
Greater Nagpa Izzthork: AC 1, HD 12**, hp 48, Move 120ft, THAC0 8, Att 1 bite for 1d8 or special, Save MU12, Ml 8, Align Chaotic, XP 2700 
Create Flames (3/day), causing a burnable object (such as clothes or knapsack) to burst into flames, causing 2d6 damage per round of contact with a creature,
Darkness (3/day), 
Phantasmal Force (3/day)
Paralysis (1/day): all lawful creatures within 10' of the nagpa must save vs Spells or be paralysed for 1d4 rounds
Corruption (3/day) - this will cause a single non-living item within 60' to decay into uselessness. Magic items are allowed a saving throw vs spells as the character using them
Memorised Spells: Wall of Force, Dimension Door, Fireball, Web, Sleep

Art by Keith Parkinson
from X4: Master of the Desert Nomads


Common Monster Stats

Lesser Nagpa: AC 5, HD 6**, 24hp, Move 120ft, THAC0 12, Att 1 bite for 1d6 or special, Save MU6, Ml 7, Align Chaotic, XP 725. Spec abil: 
Create Flames (3/day), causing a burnable object (such as clothes or knapsack) to burst into flames, causing 2d6 damage per round of contact with a creature, 
Darkness (3/day), as per 1st level cleric spell, 5ft radius around point or creature
Phantasmal Force (3/day), as per 2nd level MU spell 
Memorised spells: 1 x 1st level MU spell, 1 x 2nd level MU spell, 1 x 3rd level MU spell

Minotaur: AC 6, HD 6, hp 28, Move 120ft, THAC0 14, Att 1 battle axe for 1d8+2, Save F6, Ml 12, Align Chaotic, XP 275

Nagpa: AC 3, HD 9**, hp 40, THAC0 11, Att 1 bite for 1d8 or special, Save MU9, Ml 8, Align Chaotic, XP 2300 Spec abil:
Create Flames (3/day), causing a burnable object (such as clothes or knapsack) to burst into flames, causing 2d6 damage per round of contact with a creature, 
Darkness (3/day), as per 1st level cleric spell, 5ft radius around point or creature
Phantasmal Force (3/day), as per 2nd level MU spell 
Paralysis (1/day): all lawful creatures within 10' of the nagpa must save vs Spells or be paralyzed for 1d4 rounds
Memorised Spells:  1 x 1st level MU spell, 1 x 2nd level MU spell, 1 x 3rd level MU spell, 1 x 4th level MU spell 


Saturday, 18 April 2026

Scenario #16: The Caverns Beyond the Mine


This is a short adventure for characters of levels 1-3 who have completed Vlastag Silver Mine. At the back of the mine in room 17 there is a pothole in the floor dropping down 40ft to the floor of area 1 on this map. If the PCs are brave or foolish enough to climb or abseil down, they will enter this cave complex which is a part of the Shadowdeep, albeit part that is very close to the surface world. . 
This short adventure is not all hack and slash. A lot of the inhabitants of these caves are fungivorous and are not interested in attacking adventurers - this is more of a snapshot of an underground wilderness the PCs are travelling through than an underground fortress or obstacle course. Having said that there are 2 sentient factions here, the troglodytes (areas 9-11) and the goblins (areas 20-24), though it is possible that the PCs find their way out without encountering either of these groups.  
Here the main aim is to exit the cave system safely. The PCs start in area 1 (descending from area 17 in the Vlastag Mines) and the way to the surface is the southern exit of area 16 here. 

1) This cavern holds 4 giant fire beetles grazing on a large patch of harmless fungi. The fire beetles are not aggressive but will defend themselves if attacked. There is of course an opening in the ceiling (marked a) leading to area 17 in Vlastag Silver Mine. 
Giant Fire Beetles: AC 4, HD 1+2, hp 6 each, Move 120ft, THAC0 18, Att 1 bite for 2d4, Save F1, Ml 7, Align N, XP 15 each

2) Empty apart from some broken stalactites and stalagmites

3) 6 cave lice live here. They are harmless unless attacked, and will try to scurry away from humanoids.  Note that embedded in the walls here are 5 clear quartz crystals worth 30gp each. However, removing them will generate a ringing frequency that causes the lice to react angrily. It takes 1 turn to remove each crystal, or half that if the PCs have pickaxes. 
Cave Lice: AC 2 on top, 7 underneath, HD 1, hp 4 each, Move 60ft, THAC0 20, Att 1 bite for 1d3, Save NM, Ml 6, Align Neutral, XP 10 each

4) There is a white ape in the patch of fungi in the northern alcove. It has unwisely been grazing on mushrooms with a psychedelic effect, and and the ape now acts as if under the effects of a confusion spell - roll on the Confusion effects table when first encountered and again after every game turn. The DM can also use the NPC reaction table but without charisma modifiers. If the roll indicates a friendly reaction from the ape, it believes the PCs to be fellow apes and will behave accordingly. 
These psychedelic fungi are greenish-yellow in hue and there is one particular patch of them. Collecting the whole patch (10lb weight) will be lucrative as alchemists will be interested in the fungal properties (100gp value to alchemists or herbalist).
White Ape: AC 6, HD 4, hp 20, Move 120ft, THAC0 16, Att 2 claws for 1d4/1d4, Save F2, Ml 7, Align N, XP 75

5) This cavern has a stream running through it from west to east. The stream is shallow (1ft deep, 5ft wide) but splashing around in it are 3 giant toads. They are carnivorous and will attack any humanoids that enter their stream. They will target the smallest-looking member of the party as they are after an easy meal. 
Giant Toad: AC 7, HD2+2, hp 10 each, Move 90ft, Att 1 bite for 1d4+1 or 1 tongue (range 15ft), dragging small creatures to toad. On a to hit roll of 20, small opponents are swallowed whole, taking 1d6 damage/round. Save F1, Ml 6, Align N, XP 25 each

6) This side cave is empty

7) This large cavern is apparently empty but high up in the vaulted ceiling there are 2 giant bats. They are not particularly aggressive and if left alone they will stay up in their ceiling roost - they have had their fill of invertebrate prey. But if disturbed (e.g. shot at) they will defend themselves. 
Giant Bat: AC 6, HD 2, hp 6, 8, Move 30ft/fly 180ft, THAC0 18, Att 1 bite for 1d4, Save F1, Ml 8, Align N, XP 20 each

8) This cavern has several patches of fungi, and there are creatures grazing on them - in the northern patch there are 4 cave locusts while in the southern patch there are 6 manticore rats. They ignore each other and will probably ignore the PCs if there are no loud noises or acts of aggression. 
Cave Locust: AC 4, HD 2*, hp 9 each, Move 60ft/fly 180ft, THAC0 19, Att 1 bite for 1d2 or 1 bump for 1d4, Save F2, Ml 5, Align N, XP 25. Gooey Spit: If a locust spits at an opponent it rolls to hit AC 9. If successful the opponent must save vs poison or be incapacitated for 1 turn due to awful smell.  
Manticore Rat: AC 8, HD 1, hp 4 each, THAC0 19, Att 1 tail for 1d4, Save NM, Ml 5, Align N, XP 10

9) The Pointed Cave: This cave is filled with stalactites and stalagmites, and is home to a pack of 4 troglodytes who will try to use the rock formations to ambush any humanoids wandering through. They will hold off on their stench until melee is already initiated. 
Troglodyte: AC 5,HD 2*, hp 9 each,  Mv 120ft, THAC0 18, Att 2 claws/1 bite for 1d4/1d4/1d4, special atttack: stench, Ml 9, Save F2, Align C, XP 30 each
Troglodyte stench: Troglodytes can release a stench at will which requires opponents within 10ft to save vs poison or suffer -2 to hit while in melee with the troglodyte until the end of the encounter
Troglodyte camouflage:  Troglodytes have chameleon-like camouflage and can surprise opponents on 1-4 on d6

10) This side cave has 2 troglodytes  guarding a cluster of 6 large eggs (laid by a female troglodyte). 
Troglodyte: AC 5,HD 2*, hp 9 each,  Mv 120ft, THAC0 18, Att 2 claws/1 bite for 1d4/1d4/1d4, special atttack: stench, Ml 9, Save F2, Align C, XP 30 each
Troglodyte stench: Troglodytes can release a stench at will which requires opponents within 10ft to save vs poison or suffer -2 to hit while in melee with the troglodyte until the end of the encounter
Troglodyte camouflage:  Troglodytes have chameleon-like camouflage and can surprise opponents on 1-4 on d6

11)  Here are 2 troglodytes and a troglodyte leader, a particularly large and craggy individual who bosses the other troglodytes around. In an earthenware pot there is the troglodytes’ treasure: 5400sp, 1100gp, 4 moss agate gems worth 40gp each and a non-magical amulet of gold and lapis lazuli worth 600gp
Troglodyte Leader: AC 5, Move 120ft, HD 5+5, 25hp, THAC0 14, Att 2 claws/1 bite for 1d4+1/1d4+1/1d4+1, Spec Abil: Camouflage (surprise opponents on 1-3 on 1d6), stench as normal troglodytes, Save F5, Ml 10, Align C,  400xp
Troglodyte: AC 5,HD 2*, hp 9 each,  Mv 120ft, THAC0 18, Att 2 claws/1 bite for 1d4/1d4/1d4, special atttack: stench, Ml 9, Save F2, Align C, XP 30 each
Troglodyte stench: Troglodytes can release a stench at will which requires opponents within 10ft to save vs poison or suffer -2 to hit while in melee with the troglodyte until the end of the encounter
Troglodyte camouflage:  Troglodytes have chameleon-like camouflage and can surprise opponents on 1-4 on d6

12) This side cave is empty

13) This end of the large cavern is occupied by a giant draco lizard that is currently clinging to a cleft in the ceiling, ready to swoop down on potential prey. 
Giant Draco Lizard: AC 5, HD 4+2, 15hp, Move 120ft/fly 210ft, THAC0 15, Att 1 bite for 1d10, Save F3, Ml 7, Align N, 125xp

14) This side cave is home to 5 manticore rats. They will squeak loudly at anyone entering but won’t attack except in self-defence. 
Manticore Rat: AC 8, HD 1, hp 4 each, THAC0 19, Att 1 tail for 1d4, Save NM, Ml 5, Align N, XP 10

15) This oversized alcove has numerous fungi in a large patch, and is being grazed by 8 cave lice. 
Cave Lice: AC 2 on top, 7 underneath, HD 1, hp 4 each, Move 60ft, THAC0 20, Att 1 bite for 1d3, Save NM, Ml 6, Align Neutral, XP 10 each

16) This great cavern has a ceiling about 50ft high. To the south there is a large tunnel about 30ft wide and 20ft high that leads out of the cave system and to an exit onto the surface in the middle of a copse of oak trees not far from the entrance of Vlastag Silver Mine. 

17) This grand cavern has a high ceiling and a stream running through it. The stream forms a pool and in here there is a rock python, lying in wait for prey.  The rock python has a gem (a large Zircon worth 500gp) lodged in its stomach that can be found if cut open. Discarded on the edge of the pool are a set of goblin-sized leather armour and a goblin-style shortsword (left by the deceased goblin chief). Also scuttling around the edges of the cavern are 7 giant fire beetles in a small herd that will not attack if left alone. 
Giant Fire Beetles: AC 4, HD 1+2, hp 6 each, Move 120ft, THAC0 18, Att 1 bite for 2d4, Save F1, Ml 7, Align N, XP 15 each
Rock Python: AC 6,  HD 5 , hp 21, Mv 90ft, THAC0 15, Att 1 bite for 1d4 or 1 squeeze for 2d4, Save F3, Ml 8, Align N, XP 300, If bite attack is successful the python will wrap itself around target and squeeze for automatic 2d4 damage per round (no need to roll to hit)

18) This room is covered in stalactites and stalagmites and is difficult to move around (half movement) if the moving creature does not have a climb speed. There are 2 giant crab spiders here that will attack any intruders that get close enough. The northern end is covered in cobwebs and in the cobwebs are 2 corpses of hobgoblins, former guards in the silver mine. One of them has 5 silver ingots (worth 100sp/10gp each) while another has a sack of 125gp. 
Crab Spider: AC 7, HD 2* hp 5 & 8, Mv 120ft, THAC0 18, Att 1 bite for 1d8+ poison (save vs poison or die in 1d4 turns), Save F1, Ml 7, Align N, XP 25

19) This cave has many different fungi. Lurking in the patch is a shrieker that is covered in yellow mold - anyone attacking the shrieker will release yellow mold spore clouds. The shrieking will attract both the giant crab spiders from area 18 and the goblins in area 20. The goblins know of the yellow mold and will not go near the shrieker. 
Shrieker: AC 7, HD 3 (13 hp), Mv 9ft, THAC0 none, Shriek attracts monsters, Save F2, Ml 12, Align N, 20xp 
Yellow Mold: AC (always hit), HD 2**, hp 10, Move 0, THAC0 n/a, Att see below, Save F2, Ml n/a, Align N, XP 30. Spores: 50% chance per being hit that the yellow mold will release a cloud of toxic spores in 10ft x 10ft x 10ft volume. Anyone caught in this cloud must save vs Death Ray or choke to death in 6 rounds 

20) Here are 6 goblins, 2 goblin archers + 1 goblin veteran around a campfire. There are also 2 barrels - one of low-quality beer and another with edible fungi. 
Goblin: AC 6, HD 1-1, hp 4 each, Move 60ft, THAC0 19, Att 1 weapon for 1d6, Save NM, Ml 7, Align C, XP 10 each, equipment: leather armour, shield , hand axe, 10sp 
Goblin archer: AC 7, HD 1-1, hp 4 each, move 60ft, THAC0 19, Att 1 shortbow (range 50ft/100ft/150ft) for 1d6 or 1 hand axe for 1d6, Save NM, Ml 7, Align C, XP 10 each, equipment: leather armour, shortbow, quiver +10 arrows, hand axe, 10sp
Goblin Veteran: AC 6, HD 2-1, hp 9, Move 60ft, THAC0 17, Att 1 shortsword for 1d6+2, Save F2, Ml 8, Align C, XP 20, Equipment: Leather armour, Shield, Shortsword +1, 35gp & 100sp

21) There are 4 goblins & 2 goblin archers here, guarding two patches of fungi that have been fenced off with 5ft high wicker fences.  Inside the fences among the fungi are  22 bat-eared rabbits (10 in the north patch, 12 in the south patch). 
Goblin: AC 6, HD 1-1, hp 4 each, Move 60ft, THAC0 19, Att 1 weapon for 1d6, Save NM, Ml 7, Align C, XP 10 each, equipment: leather armour, shield , hand axe, 10sp
Goblin archer: AC 7, HD 1-1, hp 4 each, move 60ft, THAC0 19, Att 1 shortbow (range 50ft/100ft/150ft) for 1d6 or 1 hand axe for 1d6, Save NM, Ml 7, Align C, XP 10 each, equipment: leather armour, shortbow, quiver +10 arrows, hand axe, 10sp

22) There are 10 goblins here, and about 20 straw mattresses. This is the goblin sleeping area. 
Goblin: AC 6, HD 1-1, hp 4 each, Move 60ft, THAC0 19, Att 1 weapon for 1d6, Save NM, Ml 7, Align C, XP 10 each, equipment: leather armour, shield , hand axe, 10sp

23) This cave has a pool of water and a patch of fungi. There are 4 cave locusts here that are quite skittish and will spit and jump if any intruders enter. The goblins use them as an improvised alarm. To the east there is a passageway that gradually descends deeper into the shadowdark.  
Cave Locust: AC 4, HD 2*, hp 9 each, Move 60ft/fly 180ft, THAC0 19, Att 1 bite for 1d2 or 1 bump for 1d4, Save F2, Ml 5, Align N, XP 25. Gooey Spit: If a locust spits at an opponent it rolls to hit AC 9. If successful the opponent must save vs poison or be incapacitated for 1 turn due to awful smell.

24) 4 goblins + 3 goblin archers + 1 goblin minor shaman. The shaman, Tangrath, has found herself as the leader of the goblins here. There are also 2 human captives tied up in a corner - slaves who fell down into the cave system from the silver mine. Although the goblins were considering eating them, the goblin shaman is smart enough to use the captives as a bargaining chip. At the DM’s discretion the PCs can be awarded 100xp if the two captives are returned safely to Luln. 
On the north wall of the cave is a chest. It is locked and the shaman has the key. Inside are 6300sp, 1200gp and 2 potions (Potion of Levitation and Potion of Gaseous Form)
Goblin Minor Shaman: AC 7,  HD 4(d6)*, hp 15, Move 60ft, Att 1 staff for 1d6 or 1 spell, Save C4, Ml 8, Align C, XP 125, Equipment: leather armour, quarterstaff, unholy symbol, scroll of clerical spells (Speak with Animals, Silence 15ft r, Locate Object); prepared spells: Cure Light Wounds, Rage, Hold Person 
Goblin: AC 6, HD 1-1, hp 4 each, Move 60ft, THAC0 19, Att 1 weapon for 1d6, Save NM, Ml 7, Align C, XP 10 each, equipment: leather armour, shield , hand axe, 10sp
Goblin archer: AC 7, HD 1-1, hp 4 each, move 60ft, THAC0 19, Att 1 shortbow (range 50ft/100ft/150ft) for 1d6 or 1 hand axe for 1d6, Save NM, Ml 7, Align C, XP 10 each, equipment: leather armour, shortbow, quiver +10 arrows, hand axe, 10sp
Captives: 
  • Belsara - human female, age 40, align N, stats as NM, weaver and wool spinner from a hamlet outside of Luln
  • Velnik - human male, age 25, align L, stats as MU1, from Luln, mage’s apprentice and scribe, speaks Goblin and has spoken to the shaman though not to much effect. 

Sunday, 22 February 2026

Scenario #15: Destroy the Siege Weapons!


Introduction

This is a short adventure using the B/X rules for characters of levels 2-4, set in Karameikos in the Known World. 

Scouts in the town of Penhaligon have told their captain they have spied hobgoblins and other humanoids constructing siege weapons in the hills near town. Given that Penhaligon is the only clear target for miles around and also news about the assault on Duke's Road Keep, Lady Penhaligon and her advisors have decided to deal with this preemptively, before the seige weapons get anywhere near the town walls. The PCs are asked to deal with this situation and destroy the siege weapons, and perhaps make things difficult for the enemy to build more of them. The PCs are of course entitled to any treasure they find. 

The hobgoblins have set up base in an abandoned dwarf hall that has a courtyard and perimeter wall outside the underground chambers. They are assisted by human members of the Cult of Chaos who want to see Penhaligon fall. 

Key to the Map

1) The Courtyard. This is surrounded by a wall 20ft high with a walkable parapet and four towers about 25ft high each. The towers are solid, not hollow, so are really just stone platforms with battlements around the top and an external staircase for each one. The guards manning each one are as follows:

1a) 2 hobgoblin crossbowers, 1 hobgoblin

1b) 2 hobgoblins, 1 hobgoblin crossbower

1c) 2 hobgoblin crossbowers, 1 hobgoblin Sergeant. 

1d) 2 hobgoblins, 1 hobgoblin crossbower. 

Note that the hobgoblins in 1b and 1c man the front gate. Any hobgoblin has a 40% chance of being asleep. However, if not asleep then a hobgoblin will notice combat or intruders going on in any adjacent tower. Also a hobgoblin can alert their comrades in an adjacent tower with a loud shout (this can be done at the same time as combat or movement) . This is not intended to be an easy encounter and if the PCs are not clever or careful they may find themselves being mobbed by 11 hobgoblins. Getting through the main gate is not easy as it is barred from the inside with a big wooden beam. Thieves can easily scale the walls - the stonework is rough enough that those trained at climbing need not make a check. Non-thieves will need to make a dex check when trying to climb either the walls or a tower - failure means falling to the ground and taking 1d6 damage. Ropes or ladders may help in this case. Disguises, bluffing and magical charming might work, getting the hobgoblins to open up the gate voluntarily as the hobgoblins have seen human cultists of chaos come and go. 

2) Dining room. There are 4 hobgoblins + 2 hobgoblin crossbowers here as well as 2 tables with 4 chairs each. In a corner is a metal stove with a pot of some sort of stew and  five dead rabbits hanging from hooks waiting to be butchered. There is also a cupboard containing earthenware crockery, metal pots and crude iron cutlery. 

3) The Armoury. This room has racks holding 8 sets of hobgoblin-sized leather armour, 5 shields, 4 hand axes, 5 spears, 4 crossbows and 110 crossbow bolts. 

4) The Dorm. This room has 6 bunk beds and currently has 4 hobgoblins, unarmoured and asleep. They will take 1 turn to don their armour if woken, or if attacked while unprepared they will fight without armour (AC 9). 

5) 2 hobgoblin sergeants are here. Similar to those in room 4 they are unarmoured and asleep unless given prior warning - they will be woken by fighting in room 4 and will prepare themselves in 1 turn before rushing to aid the regular troops. There are 3 beds here and chests containing the sergeants' personal belongings. Sitting on a table is a silver candelabra worth 200gp. 

6) The well. This is 20ft diameter and although the water surface is fairly close to the floor level, the water is very deep (40ft). Although drawing water from the surface is relatively safe, anyone swimming or sinking deeper than 20ft into the well will find the well shaft widens out into a large water-filled chamber and there are inhabitants near the bottom, 3 giant pirhanas. If these are defeated and the PCs don't drown, 40ft below the surface the skeletal remains of a dwarf still wears a gold medallion worth 600gp might be found. 

Giant Pirhana: AC 6, Move 150ft swim, HD 3+3, hp 13, 14, 17, THAC0 16, Att 1 bite for 1d8, Save F2, Ml 7, XP 50

7) Hobgoblin Captain: Here is the leader of the hobgoblins, Shugguthol a tough veteran, and 2 hobgoblin sergeants as his pals and bodyguards. He has a key around his neck that unlocks the treasure chest in this room. It contains 4300sp, 540gp and 4 gems worth 50gp each (a quartet of banded agates). Note that the chest also contains correspondence (in hobgoblinish) from a hobgoblin king based north of Penhaligon who is currently launching attacks against a village called Guido's Fort. 

Shugguthol, hobgoblin captain: AC 3, Move 60ft, HD 4+4, hp 26, THAC0 15, Att 1 sword for 1d8+2, Save F4, Ml 10, Align Chaotic, XP 125, equipment: Chain Mail, Shield +1, Sword +1, dagger

8) Gaerron the Engineer. This room is the quarters of a human military engineer who has turned to Chaos and with a deep hatred of the rulers of Penhaligon who exiled him. His room has a bed, a chest with personal belongings and also a table with pens, paper and lots of drawings and designs for various siege engines and other large mechanical devices. Although unhinged and some of the designs are ridiculous, other designs are ingenious and would be of interest to other engineers. Think of Leonardo da Vinci meets Rube Goldberg. The whole bundle of designs is worth about 100gp if the right buyer can be found. He also has a bookshelf of engineering and mathematical textbooks, as well as some books describing magi-tech as practiced by gnome tinkers. The whole collection of books is worth another 150gp though there are 25 books, each weighing 1lb/10cn. He also has a small bag of 230gp & 24pp. 

Gaerron:  AC 4, Move 90ft, HD F4, hp 23, THAC0 16, Att 1 halberd for 1d10+1, Save F4, Ml 9, Align Chaotic, XP 125, equipment: Chain Mail +1, Halberd, Dagger

9) Ogre Guards: These two ogres stands guard over the quarters of the chaos cultists and are loyal to them. There is a bell hanging off the wall to one side and if the ogres feel threatened or need help they will ring the bell to alert the two cultists in rooms 10 (Naellissa) and 11 (Jorrath).

Ogre: AC 5, Move 90ft, HD 4+1, hp 16, 20, THAC0 16, Att 1 club for 1d10, Save F4, Ml 8, Align Chaotic, XP 125, equipment: crude hide armour, oversized club, shortsword, 60gp each

10) Naellissa , Chaos priestess. In her quarters she has two chests: one contains her personal belongings - the other is a rather dangerous gift from a senior cleric of Chaos: 7 crawling claws. Naellissa cannot actually control them; they will not attack her, but they will scurry out and attack anyone else in the vicinity. She has found trying to get them back in the chest is very difficult and usually involves trapping each one with an up-turned bucket. However, if she feels threatened she will open this chest and unleash the crawling claws.  Naellissa is a fervent true believer and wants to see the siege machines here knock down the walls of Penhaligon, and will do what it takes to see it done. The chest containing the crawling claws has a false bottom - opening it reveals 200pp and a jade gem worth 400gp, as well as a letter of commendation from a mysterious cleric of Chaos called The Rahib in the Temple of the Gray Mountain, near the elven village of Kota-Hutan. 

Chaos Priestess: AC 4,Move 90ft, HD C3, hp 11, THAC0 17, Att 1 mace for 1d6 or 1 spell, Save C3, Ml 8, Align Chaotic, XP 75, equipment: Chain mail, shield, mace, unholy symbol; spells: Cure Light Wounds, Detect Magic 

Crawling Claw: AC 8, Move 60ft, HD 1/2, hp 2, THAC0 20, Att 1 claw for 1d3, Save NM, Ml 12, XP 5  

11) Jorrath the Chaos Mage & Gark. Jorrath is the overseer of this whole location, and can command Naellissa, Shuggothol and Gaerron if necessary. However, he is a wily fox and if things look bad he may try to surrender to the PCs, claiming that he is just an underling and he has valuable information and he was never really convinced by the Cult of Chaos anyway. He is accompanied by a gark, a magical goblin-giant hybrid whom Jorrath rescued from cruel slavery, and now owes Jorrath his life.  Underneath his bed is a loose flagstone. Under the flagstone is Jorrath's sack of treasure: 1700gp, 100pp and a bejewelled silver goblet worth 600gp. 

Chaos Mage: AC 7, Move 120ft, HD MU4, hp 11, THAC0 17, Att 1 dagger for 1d4+1 or 1 spell, Save MU4, Ml 7, align Chaotic, XP 200, equipment: Dagger +1, Spellbook, Potion of Healing, Ring of Protection +1; spells: Magic Missile, Charm Person, Mirror Image, Caustic Bolt (also in his spellbook but not prepared are: Read Magic, Detect Magic, Locate Object, Phantasmal Force)

Gark: AC 4, Move 90ft, HD 4+4, hp 26, THAC0 15, Att 1 battleaxe for 1d8+2, Save F4, Ml 8, Align Chaotic, XP 125, equipemnt: chain mail, battleaxe, gold chain worth 75gp wrapped around wrist. 

12) Goblin worker quarters. In here are 5 goblin workers relaxing between shifts. The floor is dotted with straw mattresses and there is a water barrel and a box of rather stale bread in one corner. 

Goblin workers: AC 7, Move 60ft, HD 1-1, hp 4, THAC0 19, Att 1 tool for 1d4, Save NM, Ml 6, Align Chaotic, XP 10, equipment: leather work apron, tool (carpentry hammer, adze, saw, chisel), 5sp each

13) Store room: This place has boxes of nails, screws, planks of timber, sheet metal and coils of rope, the raw materials from which the siege weapons are crafted. 

14) The workshop. Here are 3 hobgoblins, a hobgoblin sergeant and 10 goblin workers. The goblins are wielding crafting tools, not proper weapons and are not carrying shields, though their leather work aprons function as leather armour. The hobgoblins are here to supervise the goblins, and will occasionally kick or slap one to make sure it keeps working. There are numerous parts of siege machinery, including a giant bow that will become part of a ballista, 3 ballista bolts, a ram head and several crude heavy wheels, as well as anvils, work benches and saw horses. 

Goblin workers: AC 7, Move 60ft, HD 1-1, hp 4, THAC0 19, Att 1 tool for 1d4, Save NM, Ml 6, Align Chaotic, XP 10, equipment: leather work apron, tool (carpentry hammer, adze, saw, chisel), 5sp each

15) The hall of siege weapons. Here are a catapult, a ballista and a battering ram. They are constructed out of combinations of metal, timber, rope and leather, and are best destroyed by fire. The large double doors leading from here into the courtyard are barred on this side, so entering into here from the courtyard is very difficult if not impossible without magical means. 


Common Monster Stats

Hobgoblin: AC 6, Move 90ft, HD 1+1, hp 6, THAC0 19, Att 1 hand axe for 1d6, Save F1, Ml 8, Align Chaotic, XP 15, equipment: leather armour, shield, hand axe, 10sp

Hobgoblin Crossbower: AC 7, Move 90ft, HD 1+1, hp 5, THAC0 19, Att 1 hand axe for 1d6 or 1 crossbow bolt for 1d6 (range 80ft/160ft/240ft), Save F1, Ml 8, Align Chaotic, XP 15, equipment: leather armour, hand axe, crossbow, 10 bolts + quiver, 10sp

Hobgoblin Sergeant: AC 6, Move 90ft, HD 2+2, hp 10, THAC0 18, Att 1 sword for 1d8 , Save F2, Ml 9, Align Chaotic, XP 25, equipment: scale mail, shield, sword, dagger, 5gp

Tuesday, 25 November 2025

Logos Location #15: The Reliquary of Shimmering Steel

Cartography by Dyson Logos, source


Thanks to Dyson Logos' generosity, he has made a large number of his high quality maps available for use. I have decided (with his approval) to incorporate these into locations within Mystara.

This is a B/X D&D adventure for characters of levels 3-5, nominally set in Rockhome but it could be placed elsewhere at the DM’s discretion. 

This reliquary and shrine was created by an ancient clan of dwarves now lost to time. The clan had access to a Forge of Power (perhaps the one described earlier in the blog) and could craft many magical weapons, particularly axes, that they could either use themselves or else trade to other clans for gold or bartering. Recently an expedition of dwarves has attempted to reclaim it, but unfortunately the reliquary was overrun by a band of gnolls. 

The PCs are asked by a dwarf chief to investigate what has happened to the dwarven expedition and to rescue any surviving members. The PCs may keep whatever treasure is found in the reliquary. 
 

Key to Map

1) Entrance Hall. Empty but signs of a battle, and 6 dwarf and 7 gnoll corpses litter the length of the hall. 

2) 1 giant gecko lizard lurks here. The two pillars were part of a now-broken arch that used to be a magical portal to somewhere else. 
Giant Gecko: AC 5, HD 3+1, hp 20, Move 120ft/120ft climb, THAC0 16, Att 1 bite for 1d8, Save F2, Ml 7, Align N, XP 50 

3) The Armoury. This has 12 weapon racks but none of the weapons are usable thanks to a hungry rust monster here. It can smell the sword in room 3a separated from room 3 by a rotating door that is activated by pushing a button on the wall. 
Rust Monster: AC 2, HD 5, hp 14 Move 120ft, THAC0 15, Att 1 feeler for special (destroys metal items), Save as F3, Ml 7, Align N, XP 175 

3a) This small room opens out onto the open air with a ledge and a 20ft drop down to the ground outside. Against the east wall is a weapon rack holding a Sword +1. It is made of a bronze-like metal called Orichalcum and as such is immune to rusting and rust monster attacks. 

4) Pillared Hall. Here are 6 gnolls (see common monster stats below), camped around a makeshift fire. They will attack any dwarf and will probably attack any non-gnoll. 

5) Secret room. Here is a half-starved dwarf cleric, surrounded by foes and expecting to die. His name is Grangi Bronzebolt.  
Dwarf Cleric: AC 3, HD DwC3, hp 7 (down from 11 due to hunger), Mv 60ft, THAC0 18, Att 1 mace for 1d6, Save Dw3, Ml 8, Align N, XP 35
Spells: Cure Light Wounds, Detect Magic
Equipment: Banded Armour, Shield, Mace, Holy Symbol, 12gp + 10sp

6) 4 gnolls + 1 gnoll leader are camped here, supposedly keeping an eye on the entrance hallway to intercept dwarven reinforcements. 4 weapon racks against the north wall with 5 nonmagical battleaxes and 3 maces. There is a small tunnel linking this to 6a the corridor to the south. 
Gnoll Leader: AC 3, HD 4, hp 19, THAC0 16, Att 1 sword for 1d8, Save F4, Ml 10, Align C, XP 75
Equipment: Chain mail, Shield +1, Sword, 30gp + 1 moss agate gem worth 60gp

6a) This is a corridor with a portcullis halfway along its length. The lever to lift the portcullis is next to the tunnel entrance, though a party of strong characters might be able to lift the portcullis to get under. The weapon racks along the walls are empty. In the tunnel linking this corridor and room 6 are 10 giant rats that will attack anything that enters their tunnel. Note that the tunnel is small and cramped and any adventurers except halflings and gnomes must fight at -2 to hit.   However, midway along the tunnel there is a vial containing a blue liquid - it is a Potion of Levitation. 
Giant Rat: AC 7, HD 1/2, hp 2, THAC0 20, Att 1 bite for 1d3 + possible disease, Save F1, Ml 8, Align N, XP 5

7a) Empty, just a pool of drinkable water about 5ft deep.

7b) 1 gray ooze lurks in the 5ft deep water here, and will ambush anything passing by. At the bottom of the pool are 3 gems worth 30gp each ( a trio of blue quartzes)
Gray ooze: AC 8, HD 3, hp 15, Move 10ft, THAC0 18, Att 1 pseudopod for 2d8, Save F2, Ml 12, Align N. XP 50, After first hit the ooze will stick to its victom automatically destroying any armour and doing 2d8 damage per round. Immune to cold and fire. 

7c) 4 dwarf warriors (see common monster stats below) are camped here. Their morale is low but they believed they are trapped so cannot retreat.  

8) Twisting staircase, going down heading north. There is the body of a giant gecko, killed by dwarves.

9) 4 dwarf warriors + 1 dwarf leader (Dw 3) have made their base here. The majority of the dwarves want to leave but the dwarf leader, Muldir Ironstrike, is determined to carry on and considers retreating tantamount to cowardice. 
Muldir Ironstrike, Dwarf Leader: AC 2, HD Dw3, hp 20, Move 60ft, THAC0 16, Att 1 sword for 1d8+2, Save Dw3, Ml 11, Align N
Equipment: Plate mail, Shield, Sword +1, 20gp + 10pp

10) Chapel of the Forgemaster. 1 dwarf adept (Aldara Barrelbrew, DwC2) worried about her superior (in room 5). This room holds the actual relics of Saint Orothmir the Forgemaster, a dwarf patron of smiths and craftsmen who has ascended to immortality. Either side of the altar are statues, one of him as an apprentice, one of Oromthmir at the pinnacle of his skill. 
Aldara Barrelbrew, Dwarf Adept: AC 3, HD DwC2, hp 10, Move 60ft, THAC0 19, Att 1 mace for 1d6, Save Dw2, Ml 7, Align N, XP 20
Spells: Cure Light Wounds
Equipment: Banded Armour, Shield, Mace, Holy Symbol, 2 Vials of holy water, 12gp
  
11) Chamber of statues of famous dwarven smiths. Weapon racks are empty apart from a box that contains 3 silver daggers and 1 Dagger +1

12a) The southern long passage. Here are 3 gnolls and a gnoll veteran who are holding this place to keep the dwarves bottled up in the northeast before a final assault.The gnolls are in the lower central part - there are raised walkways either side and a large pillar at the north end (leading to 12b) against which there is a weapon rack with 2 normal swords, a battle axe and a bastard sword. 
Gnoll veteran: AC 4, HD 3, hp 13, Move 90ft, THAC0 17, Att 1 morning star for 2d4, Save F3, Ml 9, Align C, XP 35
Equipment: Banded Armour, Morning Star, 40gp

12b) The northern long passage. The eastern side of this large arcade is raised up by 10ft. There are a series of alcoves on the raised side, the northmost of which has what appears at first sight to be bones and coins floating in mid-air. This is actually a gelatinous cube that has recently cleared up the bodies from a battle of gnolls against dwarves, and it will surprise those approaching on 1-4 on d6. The gelatinous cube contains 10gp + 12sp + 2 gems worth 50gp (a small amethyst) and 100gp (moonstone). 
Gelatinous Cube: AC 8, HD 4, hp 20, Move 60ft, THAC0 16, Att 1 pseudopod for 2d8+  paralysis (save vs paralysis or unable to move for 2d4 turns). Save F2, Ml 12, Align N, XP 125

13) The Crypt of the faithful. This secret place holds 10 alcoves, each containing a coffin where famous dwarf smiths are laid to rest. On top of each coffin is a weapon they made (3 battle axes, 2 warhammers, 3 maces, a normal sword, a bastard sword and a shortsword). If any of these weapons are moved, a Magic Mouth will speak: “Do not open the coffins, or suffer the ire of the dead”. If the coffins are opened or damaged, two of the dwarf corpses are revealed to be 2 wights, and they will attack the offender. Just taking the weapons will not activate the wights. In one of the coffins occupied by a wight is a silk sack containing 310pp and a bejewelled silver dagger worth 500gp (also functions as silver dagger in combat). 
Wight: AC 5, HD 3, hp 15, 11, Move 90ft, THAC0 17, Att 1 touch for energy drain, Save F3, Ml 12, Align C, XP 65 

14) This room holds a broken arch, which used to form a magical portal. The vertical pillars are still standing in the centre of the room. It has been turned into a kennel by the gnolls, housing 2 dire hyenas (that use the same stats as dire wolves). 
Dire Hyenas: AC 6, HD 4+1, hp 13, 19, Move 150ft, THAC0 16, Att 1 bite for 2d4, Save F2, Ml 8, Align N, XP 125

14 a) The Acid Stepping Stones. This corridor is flooded to 2ft deep with corrosive acid. There are a series of stepping stones and it is possible to traverse the length of the corridor with a successful dexterity check. Failure to do so means 2d6 acid damage as the person slips on a wet stone into the acid. Nobody, not even the dwarves, know why this room is like this, though it is possibly a way of destroying accidentally cursed items. Halflway along there is inscribed in the walls the message 
"Blood Red, Leaf Green then Sky Blue". This is a clue to the combination puzzle found in room 22.

15)  Empty apart from crude gnollish graffiti disparaging dwarves and their mothers

15 a & b) . These are 2 pairs of alcoves. In each alcove there is a Crystal Living Statue that normally stand to attention but will attack anyone that touches them. The living statues are shorter and stouter than most, and resemble crystalline dwarves.
Crystal Living Statue: AC 4, HD 3, hp 15 each, Move 90ft, THAC0 17, Att 2 fists for 1d6/1d6, Save F3, Ml 12, Align L, XP 35 
 
16) 5 gnolls are camped here outside the gnoll chief's place. 

17) Gnoll chief has set up his quarters here, previously the quarters for the resident cleric. He is accompanied by a pair of gnoll veterans. The gnoll chief has gathered treasure into a sack underneath his bed; it contains 1500gp, 6500sp and 4 gems worth 50gp each (a pair of Onyxes and a pair of agates). 
Gnoll Chief: AC 2, HD 5, hp 24, Move 90ft, THAC0 15, Att 1 battleaxe for 1d8 +2, Save F5, Ml 11, Align C, XP 175
Equipment: Banded Armour +1, Battleaxe +1, 2 daggers
Gnoll Veteran: AC 4, HD 3, hp 12, 15, Move 90ft, THAC0 17, Att 1 morning star for 2d4, Save F3, Ml 9, Align C, XP 35
Equipment: Banded Armour, Morning Star, 40gp

18) Chamber of the Crescent Moon. There is a huge glowing symbol of a crescent moon on the floor of this chamber, which is patrolled by a Turquoise living statue. There are 2 dead gnolls, though the turquoise living statue stays within this chamber and only attacks non-dwarf intruders while they are in here. 
Turquoise Living Statue: AC 3, HD 4+4, hp 20, Move 150ft, THAC0 15, Att 1 headbutt for 1d6+1 (+2 to hit and double damage if charging), Save F2, Ml 12, Align N, XP 200
The turquoise living statue once per day can emit an aura of lethargy instead of attacking with its headbutt: Anyone within 30ft must save vs spells or be affected by a Slow spell for 2d4 turns. Turquoise living statues are immune to Sleep, Charm and other mind-affecting magic, disease & poison. If destroyed, the Turquoise Living Statue disintegrates, leaving 2d10 pieces of turquoise worth 30gp each. 

19) The Plunging Pool is 20ft deep though there is a walkway around the north and west sides. There are also 2 statues of dwarf warriors. Anyone entering the pool will be attacked by the resident giant crab.
Giant Crab: AC2, HD 3, Move 60ft, THAC0 17, Att 2 pincers for 2d6/2d6, Save F2, Ml 7, Align N, XP 35

20) Empty apart from being 5ft deep in water. 

21) Water here is 5ft deep. Guarding a sunken chest in the middle of the room are 3 Bone Warriors (formerly dwarf warriors, so a bit shorter than usual). Inside the chest is 2300gp and 2 mithril ingots worth 1000gp each. 
Bone Warrior: AC 5, HD 3, hp 14, 10, 16, Move 120ft, THAC0 17, Att 1 weapon for 1d8+1, Save F3, Ml 12, Align C, XP 35

21a) This secret passage allows a way around the portcullis in room 22; Once on the inside of this passage the secret doors are easy to detect and open but normal difficulty applies when searching for secret doors in room 21 & 22

22) This room is divided by a portcullis. Just within reaching distance on the other side are 3 pedestals, each with a gemstone set into it, a green emerald, a blue sapphire and a red ruby respectively. This is a combination lock and the gems need to be touched in a particular order: Red, Green & Blue. If this is done, the portcullis lifts up. The gems glow slightly when touched until all three are glowing. If it is the wrong combination they then go dull again.  At the back of the room is a pedestal on which sits a War Hammer +2 +4 vs giants, the most valuable item remaining in this Reliquary. Note there is a secret door so anyone in 21a can bypass the combination puzzle. 

Common Monster Stats

Gnoll: AC 5, HD 2, hp 9, Move 90ft, THAC0 18, Att 1 morning star for 2d4, Save F2, Ml 8, Align C, XP 20
Equipment: Morning star (spikey 2-handed club), chain mail, 2d4gp (or 5gp each)

Dwarf Warrior: AC 4, HD Dw2, hp 9, Move 60ft, THAC0 19, Att 1 battle axe for 1d8, Save Dw2, Ml 5 (8 around leaders), Align N, XP 20
Equipment: banded armour, battle axe, 2d6gp (or 7gp each)

Friday, 14 November 2025

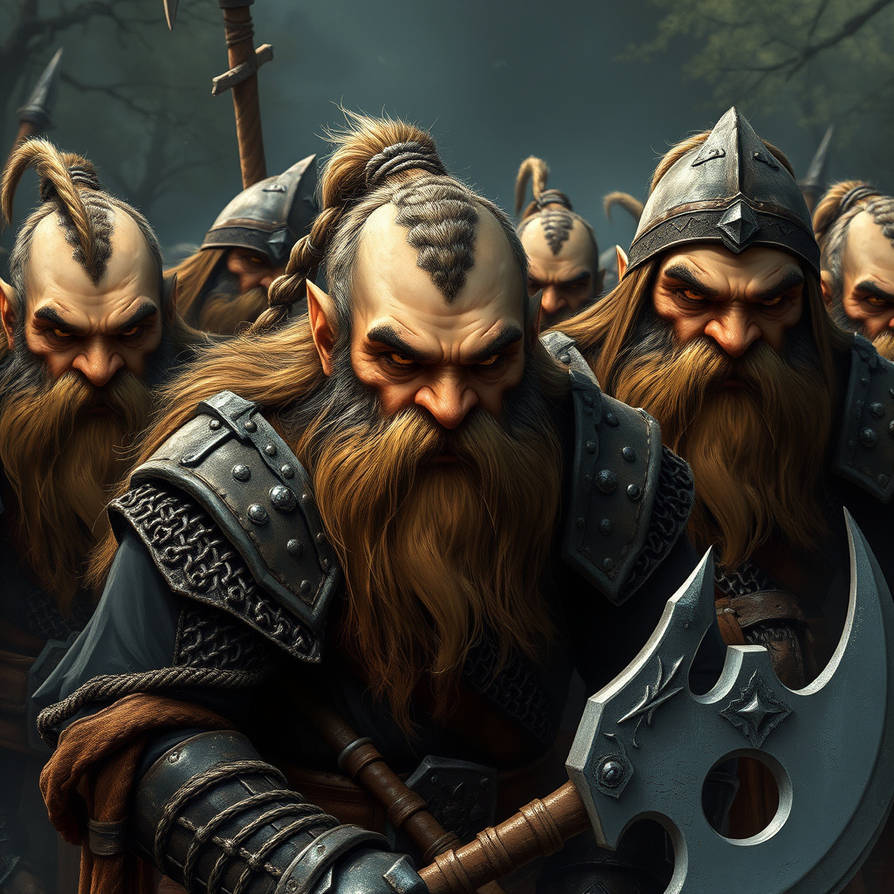
The Subversion of Clan Rungorth

Of the seven great clans of Rockhome, Clan Hurwarf is the most isolationist, distrusting other nations and non-dwarves. Most of the time this is kept in check by the rest of dwarven society welcoming foreign traders and diplomats, but every now and then it can spiral out of control into paranoid madness.  

source

Clan Rungorth is a minor clan that has split off from Clan Hurwarf because Clan Hurwarf was not being isolationist enough.  It was always on the periphery of dwarven society, with its stronghold (Torrag Ikkorn)  in the southern mountains, but in the last fifty years it has fallen under the sway of an evil dwarf cleric who has fallen from grace and is now in league with the powers of Chaos. This dwarf, Multheid the Pure, has whipped Clan Rungorth into a frenzy of paranoia, and has denounced the rest of dwarven society as being corrupt and decadent as a result of prolonged contact with such wicked and despicable races such as humans, halflings, gnomes and worst of all, elves. Now the clan is hostile to any non-dwarf, and even other dwarves from outside the clan are treated with deep suspicion.  

Multheid's most loyal followers call themselves The Protectors of the Pure, and wear black cloaks and tabards, and have shaved their heads (though not their beards). These Protectors of the Pure are believed to number about 20 and include a number of very dangerous and experienced dwarf warriors. They act as Multheid's enforcers within the clan. The Protectors of the Pure trust Multheid absolutely and think that Rockhome as a society and nation is going to collapse and Rungorth will be the last bastion of true dwarves. Draxor Tunnelwalker is the leader of the Protectors of the Pure and is Multheid’s right-hand dwarf - he is both fanatically loyal and a brutal killer. 

However, there are others in the clan who have their doubts, but they have learned to their bitter cost to keep quiet and keep their heads down, as the most outspoken skeptics have been executed on Multheid’s orders. There is a small network who call themselves the Unbelievers but they are in no position to make any effective change, but should outsiders challenge Multheid’s grip on Rungorth, there will be some who will help. To compound the situation the clan leader, Gurnor Ironhammer, believes Multheid and has all but ceded rulership to the chaotic cleric. This seems to be more a lack of leadership and backbone rather than deliberate handing over of authority.  

Clan Rungorth has one major stronghold, Torrag Ikkorn, with 230 dwarves, and several smaller outposts with about 50 dwarves in each, for a total of 450 dwarves. They strive fervently to be self-sufficient in everything and assume anything from the outside world (traded, given or even stolen) is somehow tainted. This has resulted in food shortages and even some cases of malnutrition in the clan, but any food from outside, especially from those weird Wyrwarf clan farmers, is assumed to be poisoned or drugged or diseased. 

The clan leader of Hurwarf (Lord Duric) wants to reestablish contact with Clan Rungorth, and hopefully ascertain the situation. He insists that any party doing so should be entirely composed of dwarves - he believes non-dwarves would worsen the situation. He would like any problems to be resolved as diplomatically as possible, without bloodshed. However, he is worried about a hostile reception as one messenger he sent has not returned and he fears dark forces may be at work. 

Multheid the Pure has some sort of end-game but it is not clear what it is. Perhaps he just wants rulership over a clan. It is possible that he wants to establish a long-term cult of chaos among the dwarves of Rockhome though some would say there are better candidates, particularly among the Underside of Dengar city, and better ideologies (the greed for gold and the militarism in other clans could easily be taken too far).  It is also possible that he genuinely believes what he is preaching, but if he is worried about what is happening to dwarven society, then allying with the forces of Chaos is a mad way of countering this. And this may be the truth of the matter - Multheid is mad, and is preaching his insanity to Clan Rungorth, many members of whom were already nearly as paranoid as him. His fall into the clutches of Chaos may be because lawful and neutral immortals would not accept someone so divisive and hateful as their servant and representative among mortals, but to the darker powers of Chaos that thrive on fear, hostility and madness Multheid is a useful tool. 

Multheid has had an underground extension to Torrag Ikkorn excavated, where he now resides and works, creating an army of undead (mostly reanimated dwarf corpses but any suitable humanoid body will suffice). Other dwarves, even the leader Gurnor Ironhammer, are not permitted here and it seems he has done a good job of hiding his true loyalties from Clan Rungorth. It is possible that exposing Multheid’s Chaos worship and his desecration of dwarf corpses will shock enough clan members that a sizeable rebellion against Multheid will rise up. Of course, his fanatical dwarf followers, particularly the Protectors of the Pure, will rationalise and excuse these revelations, saying that it is all necessary to protect the clan and that strange alliances (even with the forces of Chaos) are sometimes needed when the enemy (everybody else in Rockhome) is overwhelming. Which way the clan leader Ironhammer will swing could prove crucial: for him, the reanimation of dwarf bodies as zombies would be the breaking point. And if the clan chief turns against Multheid, other dwarves may do likewise, perhaps out of traditional loyalty to the clan leader or perhaps they will reconsider what is really going on in the clan. 

Just to complicate matters, the Rusty Razor tribe of goblins is causing trouble in the area, and taking advantage of Clan Rungorth's internal problems to seize territory, establish hideouts and raid caravans and small settlements. Multheid claims that these goblins are being hired and encouraged by the corrupt and decadent dwarves of Dengar, who are too cowardly and coniving to confront Clan Rungorth directly. 

A little further away is another minor clan, Clan Dursten, who are allied with Clan Everast. These dwarves are a lot more sane and reasonable, and have seen more of Rungorth's descent into madness than most other outsiders. Indeed, until about a year ago there was still some trade and military cooperation between Dursten and Rungorth but relations deteriorated when Clan Dursten's leader, Sargenford the Gnollslicer, denounced Multheid and his vile views on the rest of Rockhome's dwarves. At this point all friendly contact between Dursten and Rungorth ceased, and Clan Dursten has had to deal with a resurgent goblin menace (particularly the Rusty Razor tribe) on their own. Sargenford will listen to those sent to deal with Clan Rungorth, particularly if they are polite and reasonable. He hates and despises Multheid and would like to see him removed, but he does not want bloodshed of other dwarves - he feels that Clan Rungorth has fallen under the evil cleric’s spell and that if Multheid is removed the rest of the clan will come to their senses. 

Notable NPCs

Multheid the Pure

Str 14, Int 14, Wis 16, Dex 10, Con 16, Cha 15
AC 2, HD DwC7, hp 40, Move 60ft, THAC0 15, Att 1 mace for 1d6+2 or 1 spell, Save C7, Ml 11, Align C,
Equipment: Plate Mail, Shield, Mace +1, unholy symbol, potion of invisibility, potion of gaseous form 
Spells: (3/2/2) Cure Light Wounds, Darkness, Rage, Aura of Shadows, Bless, Cause Disease, Paranoia

Gurnor Ironhammer

Str 16, Int 8, Wis 8, Dex 12, Con 14, Cha 13
AC 1, HD Dw7, hp 41, Move 60ft, THAC0 11, Att 1 axe for 1d6+4,  Save Dw7, Ml 10, Align N 
Equipment: Banded Armour +1, Shield +1, Hand Axe +2 +4 vs giants, trolls & ogres, potion of extra-healing

Draxor Tunnelwalker

Str 16, Int 9, Wis 10, Dex 10, Con 14, Cha 15
AC 2, HD Dw6, hp 27, Move 60ft, THAC0 13, Att 1 battleaxe for 1d8+3, Save Dw6, Ml 12, Align C
Equipment: Plate Mail +1, Battleaxe +1, 3 daggers

Sargenford the Gnollslicer

Str 13, Int 12, Wis 10, Dex 10, Con 14, Cha 16
AC 1, HD Dw7, hp 46, Move 60ft, THAC0 12, Att 1 battleaxe for 1d8+3, save Dw7, Ml 10, Align L
Equipment: Plate Mail +2, Battleaxe +2, Amulet of Lie Detection.